ricicreare.it

- Wind Turbine Alternator -

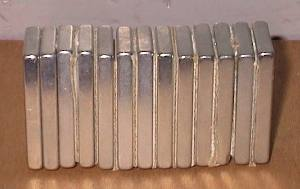
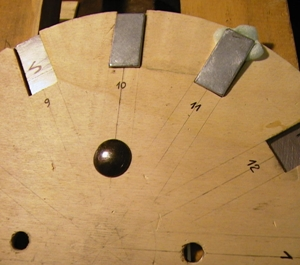
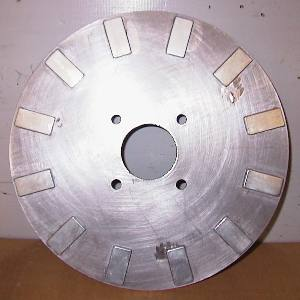
This project was very challenging for me, I should make changes because some components that I used does not have the characteristics required by the original project. I am referring mainly to the Neodymium permanent magnets that I bought with dimensions smaller for their high price. Consequently they have a "performance" less than the original so the global performance is not the top. But I was primarily interested in working of the alternator and I living in an apartment in the city (I would not know where to install a wind turbine!) for the moment I 'm not going to make changes, in the future it may be!

Download informations

DOWN LOAD INFORMATIONS

Foto 1

Coil winder

Foto 2

Complete coil winder

Foto 3

Coil

Foto 4

Coil arrangement in the stator mould

Foto 5

Particular of coils connections

Foto 6

Coils fixing with epox resin

Foto 7

Cabling arrangement in the stator mould

Foto 8

Cabling arrangement complete

Foto 9

Resin casting complete

Foto 10

Stator complete

Foto 11

Complete stator and coils junction box

Foto 12

Coils termination 1

Foto 12a

Coils termination 2

Foto 13

300 mm Diam, 6 mm Thick / Steel plate rotor

Foto 14

Template for placing magnets on the steel plate rotors

Foto 15

Template fixing on steel plate rotor

Foto 16

40x20x5 - Neodymium magnets

Foto 17

Neodymium magnets on steel plate rotor

Foto 18

Arrangement of rotor mould for resin epox casting 1

Foto 19

Arrangement of rotor mould for resin epox casting 2

Foto 20

Arrangement of rotor mould for resin epox casting 3

Foto 20b

Arrangement of rotor mould for resin epox casting 4

Foto 21

Arrangement of rotor mould for resin epox casting 5

Foto 22

Epox resin - Catalyst - glass fibre

Foto 23

Mould before resin casting

Foto 24

Resin casting 1

Foto 25

Resin casting 2

Foto 26

Fiat Panda - Hub

Foto 27

Hub with theared iron bar

Foto 28

Support 1

Foto 29

Support 2

Foto 30

Support 3

Foto 31

Support 4

Foto 32

Support with first rotor (side view)

Foto 33

Support with first rotor (top view)

Foto 34

Support with second rotor and stator

Foto 35

Particular of "sandwich" alternator

Foto 36

Left side view

Foto 37

Right side view

Foto 38

Alternator assembly on pole - 1

Foto 39

Alternator assembly on pole - 2

Foto 40

Assembly of rectifier 1

Foto 41

Particular assembly of rectifiers - 2

Foto 42

LIGHT!!!!

Top

Eolico

Home

Valid XHTML 1.0 Strict CSS Valido!